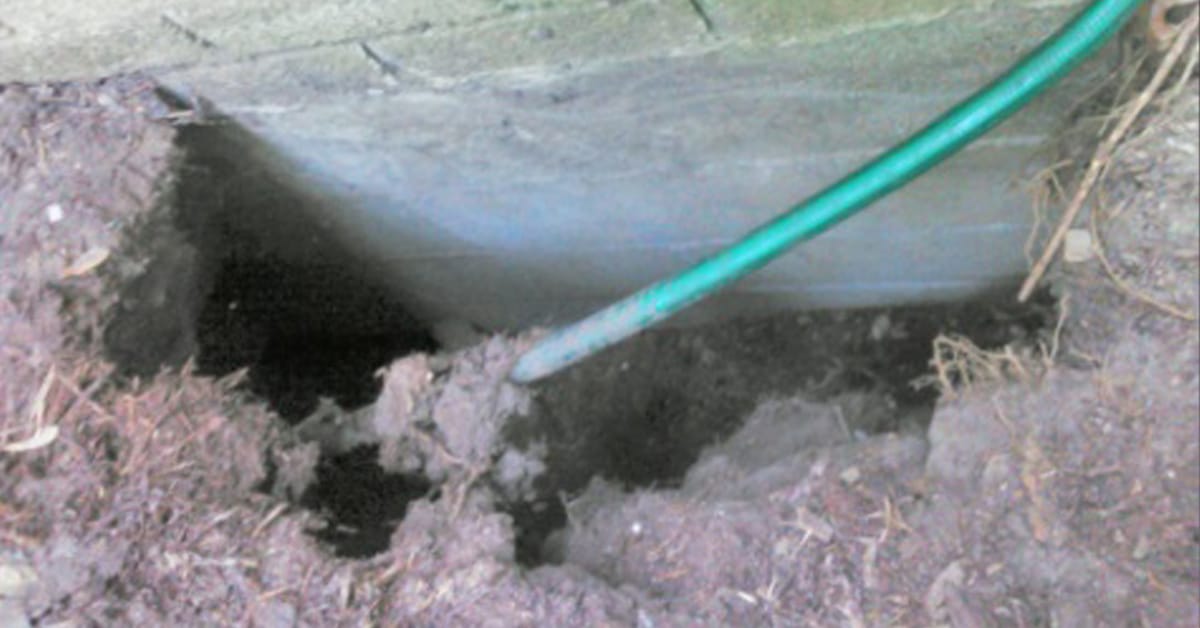
Updated: June 17, 2024 Groundhogs may look cute, but groundhog foundation damage is more serious…

What is a Rat Wall?
Who doesn’t love a summer barbecue with friends out on the deck or patio? As it turns out, humans aren’t the only creatures who like to hang around the deck! Decks, patios, sheds and other external structures provide ideal locations for animal dens. Animals such as groundhogs, skunks, opossums and raccoons like to burrow beneath these structures because the structures provide them with a secure overhead support for their dens.
The challenge with decks
It is easy enough to trap and remove a raccoon or groundhog living beneath a deck, but how do you stop other animals from returning? This is a particularly challenging problem, since each animal leaves behind a pheromone scent. The scent remains even after an animal is removed; this pheromone scent will attract other animals. This means that a deck or patio that has once had an animal living under it is more prone to future animal intrusions.
What is a rat wall and how can it help?
If you have had multiple animals removed from under your deck, you may want to consider a rat wall. A rat wall is a barrier meant to prevent burrowing animals from getting beneath your deck or patio. Despite its name, it is not solely geared towards rodents; rat walls prevent the entry of raccoons, opossums, groundhogs, mice, skunks, and anything else that burrows.
If you have not yet built your shed, patio or deck, a concrete rat wall may be feasible. Concrete rat walls are essentially extensions of the foundation slab. It’s width is generally between 1 foot and 18 inches, often at a depth of 18 inches. Some say these sorts of rat walls also reduce the likelihood of your slab heaving and cracking with the frost.
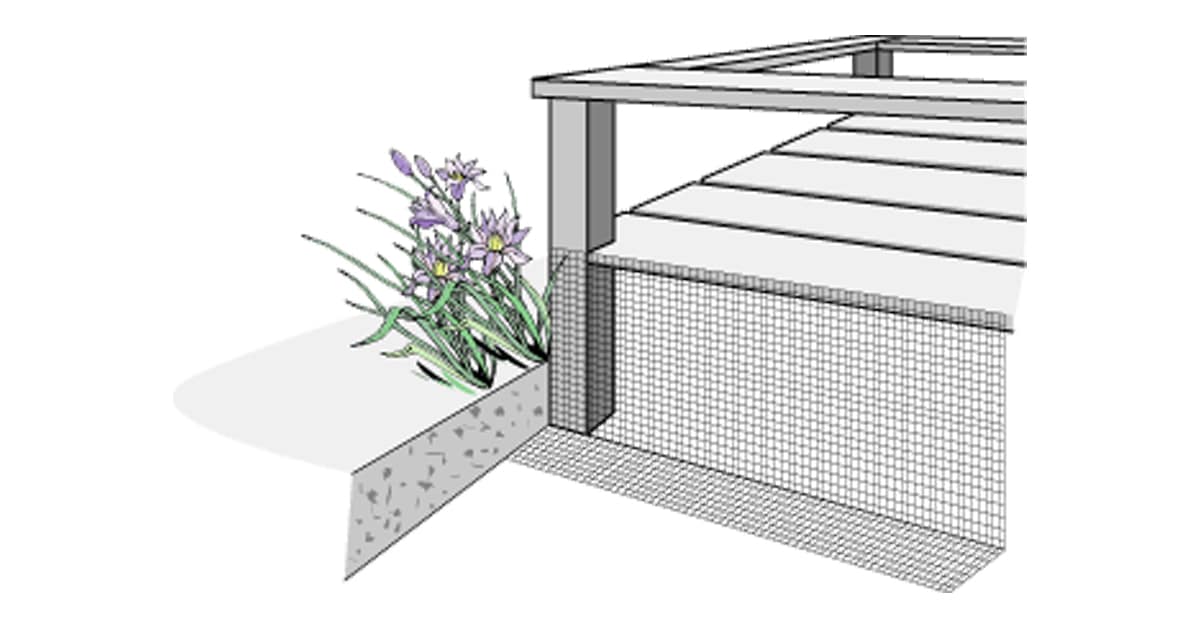
However, most people looking at rat walls for animal prevention purposes will be dealing with already constructed decks, patios, etc. where a metal rat wall will be easier to install. These sorts of rat walls typically attach to the bottom of the deck or structure and then descend down into the ground about a foot before turning at a right angle away from the structure and extending at least another half foot out laterally. The purpose for this turn is to prevent burrowing animals from digging beneath the rat wall.
Constructing a rat wall
Rat walls can be used to secure decks, patios, sheds, porches, detached garages and many other sorts of structures. If the deck or patio sits off the ground, a good portion of the rat wall will also be above ground. Either way, you will have to trench out around the area in order to get the rat wall to the required depth. Let’s look at how to build a rat wall!
Materials
A metal rat wall is typically constructed of quarter or half inch mesh (“hardware cloth”). The amount of mesh you will need depends upon how many linear feet the structure is. You will also need lath screws to attach the mesh to the structure, as well as a shovel or trenching machine, depending on how many linear feet of rat wall you are installing. If your rat wall is wider than 3 feet, you may also need hawg rings and a special hawg ring tool to attach them.
Measurements
How great of length of mesh you will need will depend on the size of the deck, patio, etc. For example, suppose a deck attached to the house is fifteen feet long by six feet wide, you will need 27 linear feet of mesh (15 + 6 + 6). The hardware cloth mesh is sold in rolls from 5 feet up to 50 feet, so make sure you purchase the mesh in the correct amount.
If the structure sits on the ground, you will want the depth of the rat wall to be around 1 foot in the ground, although you can make it deeper. But keep in mind, the rat wall needs to make a 90° turn outward; typically 1/2 foot of mesh is sufficient for the turned, horizontal portion of the wall. You also want to allow for two inches to attach the mesh to the structure. Thus, if your rat wall is going to a vertical depth of 1 foot and you have a 1/2 foot of lateral meshing, then you will need to cut your mesh at approximately 1 foot 8 inches wide (1 foot + 1/2 foot + 2 inches).
If the structure sits some ways off the ground, you will need quite a bit more width. For example, if your deck sits a half foot off the ground and you want a rat wall of 1 foot depth, your mesh will need to be 2 feet 2 inches (1/2 foot above ground + 1 foot underground + 1/2 foot lateral + 2 inches).
Trenching
Dig your trench accordingly. If you want a depth of 1 foot, dig the trench 1 foot deep. The trench should be a little wider than the lateral portion of the rat wall in order to give you space to work. If the lateral portion of the rat wall will extend out 1/2 foot, we recommend a trench 1 foot wide.
Unless your structure is relatively small, we recommend using a trenching machine or at least having some friends help you. Digging a 1 foot deep trench twelve feet long with a shovel sounds quick and easy – until you actually start digging.
Attaching the rat wall
Now that the trench is dug, it’s time to attach the rat wall. The rat wall is attached to the structure using lathe screws.
The screws should be placed sufficiently close to ensure that the mesh will not pull away from the structure. If possible, use a continual piece of mesh for each side. If you have to use multiple pieces on a single side, overlap them a little bit so that the seam offers no possible entry point. Corners should be seamed with separate pieces of mesh overlapping; do not try to wrap a single piece of mesh around a corner.
Note: If your total area to be meshed is over 3 feet tall, you may need to seam horizontally as well, as most rolls of mesh sold locally are not more than 3 feet wide. Horizontal seaming is done by connecting the two rolls of mesh using hawg rings and the hawg ring tool. This, obviously, gets quite a bit more complicated. If you do not want to seam horizontally, either make sure your total meshed area is not greater than 3 feet, or else look around online to and special order a roll of mesh that had a width of greater than 3 feet, which should be available although obviously at a greater price.
After the rat wall is attached at the structure, make a 90° bend in the mesh at the base of the trench, bending it laterally outwards from the structure. This lateral piece ensures that when a groundhog, skunk, etc. hits up against the rat wall it will not be able to just dig underneath it.
Cleaning up
Once the rat wall is attached, all that is left is to fill in the trench. Though the rat wall should be sufficient for deterring unwanted intruders, we also recommend keeping the foundation of your structure clear from small weeds and brush that provide cover for animals to skulk around behind.
Creature Control Rat Wall Installation
As you can see, there is quite a bit of precision, skill and sweat that goes in to installing a top notch rat wall. If this all sounds like too much of a headache to do on your own, we would be happy to take care of the problem for you. Creature Control’s technicians are experienced measuring and installing rat walls. If you are in one of our Michigan service areas and would like to speak to a professional about getting a rat wall quote, please visit our contact page and get in touch with us!


